The Synology DiskStation is a great NAS system for small businesses, but controlling access to sub-folders can be difficult. Sometimes you want to use Windows user groups (Windows ACL) to give one group of users full access to a shared drive, and to restrict access for another group (Group B) of users to only one subfolder (Folder B). There are many documents describing how to do this, but in my experience all of them are outdated or do not work with Synology DiskStation. These instructions are correct as of February 2016.
NAS Control Panel
- Click on the “Shared Folder” app in the Synology DiskStation Control Panel, select “Action” menu, and select the “Convert to Windows ACL” option.
- Right click on the shared folder, select “Edit” option from the menu, and select the “Permissions” tab.
- You are probably working with a Windows domain, so select “Domain User” or “Domain Group” from the drop-down menu near the top left of the “Edit Shared Folder” dialog box. The scroll through the list and select the user or group that should have full access, and tick the box “Read/Write” to give them full access.
- Repeat step 3 for any other users/groups that should have full access.
Scroll through the list to find the user/group that should have restricted access, and set the permissions as shown below.
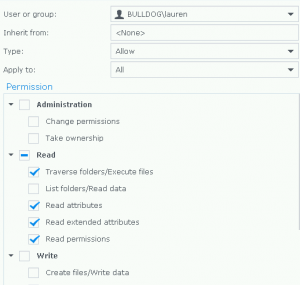 You have now set the overall permissions for the Shared Folder. So click the “OK” button to save your changes and return to “Control Panel”. Go to next page…
NAS File Station
Now we need to allow access to the subfolder to the restricted user/group.
- On the Synology DiskStation desktop, click “File Station”, and navigate to the file/folder (folder B) that you wish allow “Group B” to access.
- Right click on the folder (Folder B), and select “Properties” from the drop down menu.
Click the “Permissions” tab - Click “Create”, and select the user/group (Group B) from the drop down list near the top left of the “Permissions Editor”
- Select the permissions you wish to allow – probably all of them – and select “Ok” to save your changes, and “OK” again to dismiss the “Properties” pop-up.